Mini Mode
Mini Mode is a simplified version of the Badger GUI designed for quick, streamlined optimization runs. It removes complexity from the full GUI by consolidating routine creation onto a single page and defaulting to automatic behavior.
Launching Mini Mode
Launch Mini Mode from the command line:
badger -mini
To launch with a template preloaded:
badger -mini -t sphere_test.yaml
The -t (or --template) argument will look for a matching YAML template file in your configured template root directory.
The full GUI is still available via badger -g. The two Modes use separate UI components and do not interfere with each other.
Overview
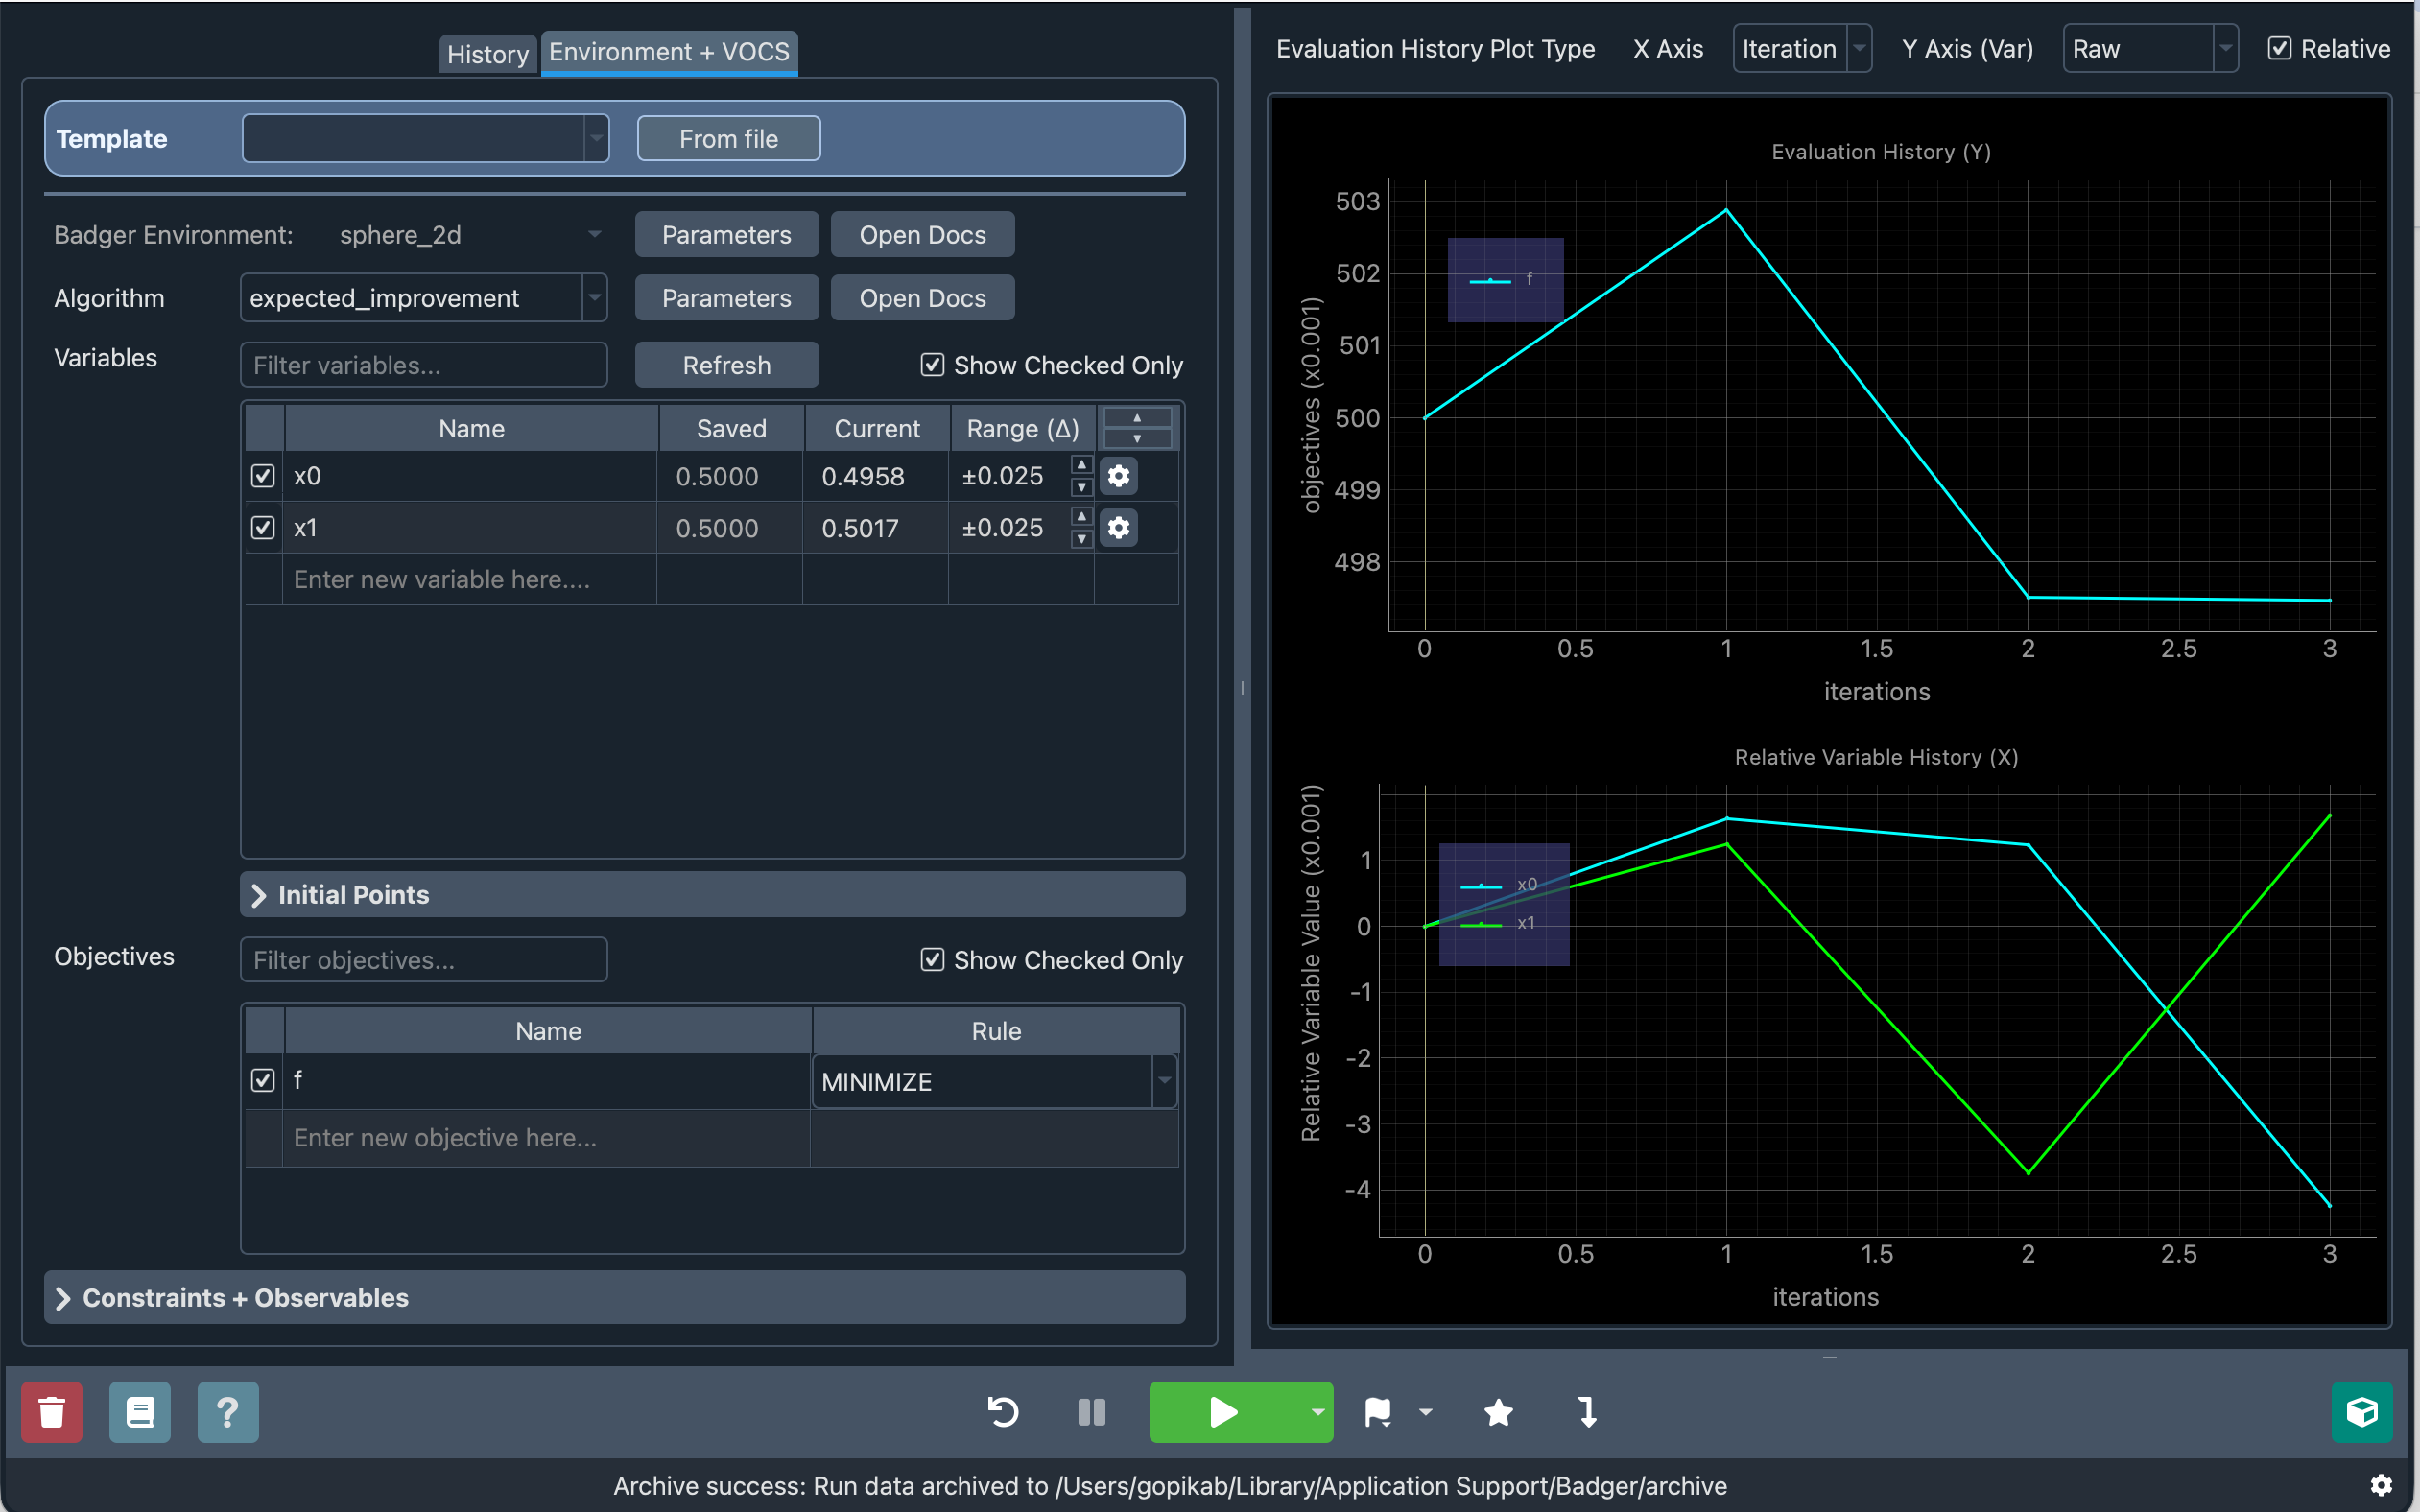
Mini Mode fits all main controls for creating and running an optimization on a single page without scrolling. The interface has two tabs:
- Routine creation — set up and launch a new optimization
- History — view and navigate past runs
Routine Creation
Selecting a Template

At the top of the page, a dropdown lets you select from available routine templates. When a template is loaded, it populates:
- Variables and their ranges
- Environment parameters
- Selected algorithm
- Constraints and objectives
Environment + VOCS Tab
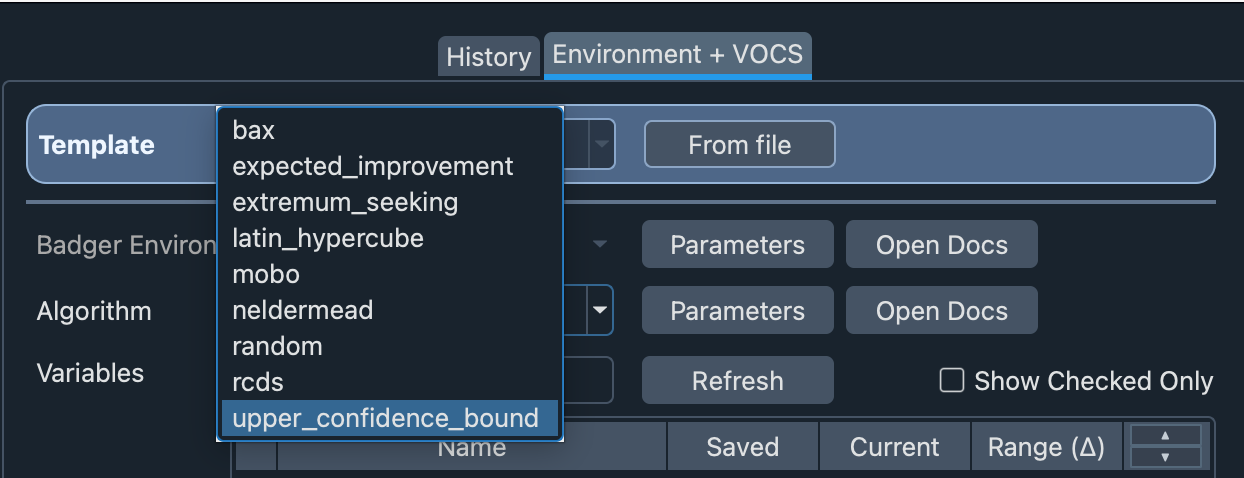
The main tab combines environment selection and VOCS configuration. Key differences from the full GUI:
- Algorithm selection is on this tab rather than a separate tab
- Algorithm parameters can be edited by expanding the "Parameters" button
- Constraints and Observables tables can be expanded from the bottom of the page (collapsed by default)
Variable Table
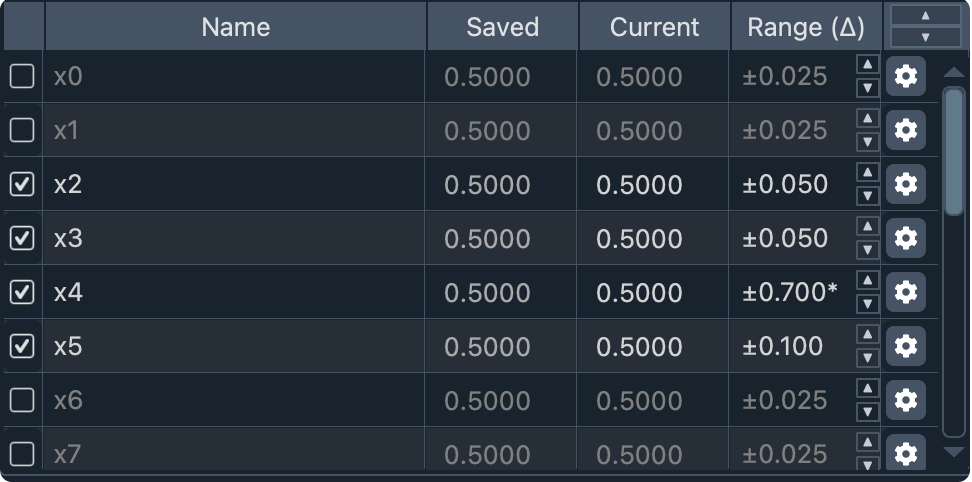
The variable table displays three key columns instead of raw upper/lower bounds:
| Column | Description |
|---|---|
| Saved | The value variables will be reset to if you press reset. Updates each time a new run starts. |
| Current | Live value read from the environment. Updates when Badger writes to variables (dial in, reset, or at each optimization step), or when the table is manually refreshed. |
| Range | Shown as a delta (±) around the current value. Based on the selected range option from the template. |
Range Indicators
- If desired bounds are clipped by hard variable limits, an asterisk (*) appears next to the range value.
- Selected variable rows appear with lighter text; unselected rows use darker gray text.
Adjusting Ranges
- Use the up/down arrows on each row to adjust the range for that variable
- Use the arrows in the header row to adjust ranges for all selected variables at once
- Up scales the range by 1.111×; down scales by 0.9× (ranges adjust proportionally)
- Click the gear icon on a row for more detailed range control via the variable range dialog
Show Checked Only
When "Show checked only" is unchecked, the table scrolls to display the first selected row.
Variable Range Dialog
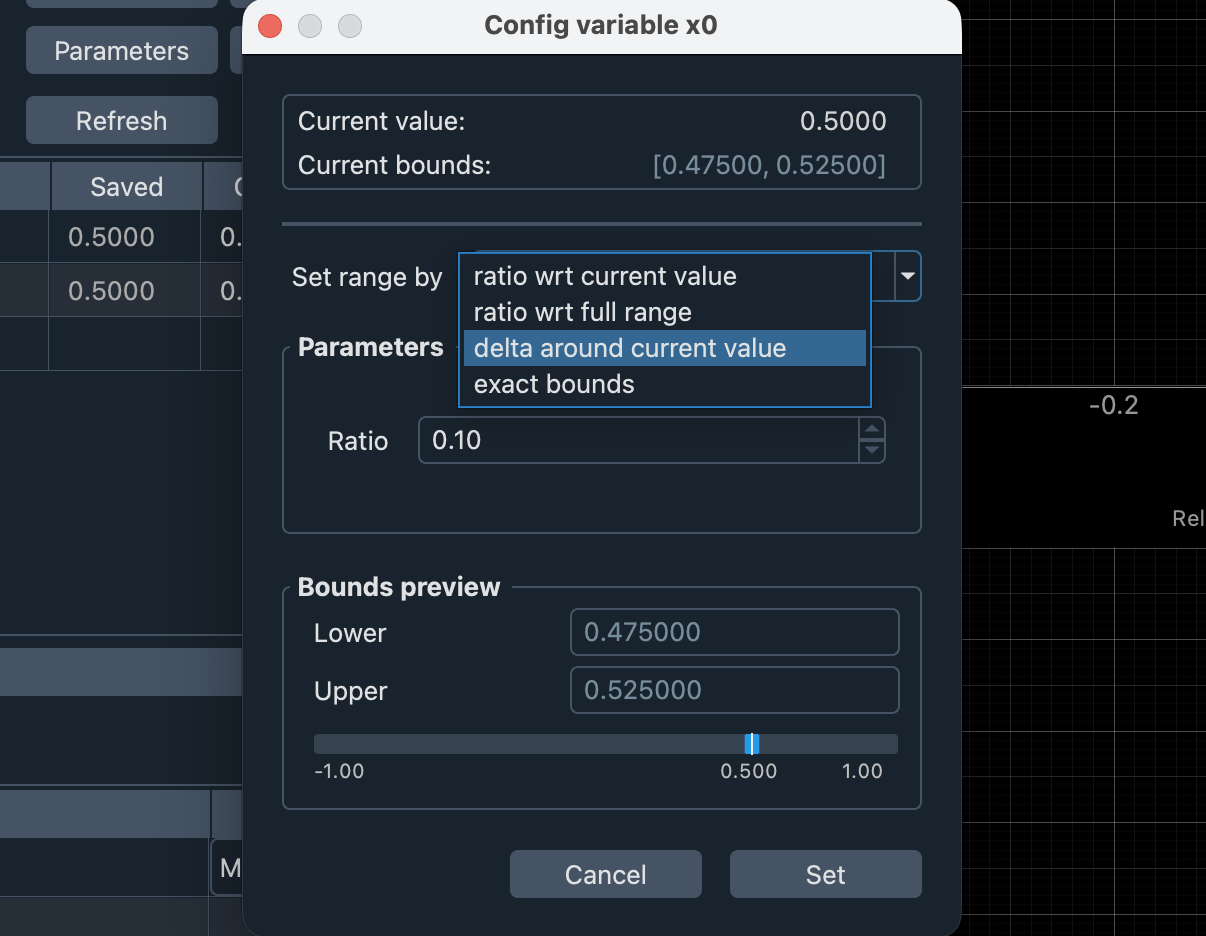
Clicking the gear icon on a variable row opens a dialog with:
- The current value of the variable
- The current low and high bounds for the variable
- Options for range selection method
- ratio wrt current value: Bounds are calculated as a fraction of the current value on either side of the current value
- ratio wrt full range: Bounds are calculated as a fraction of the full range on either side of the current value
- delta around current value: Bounds are calculated as a delta on either side of the current value
- exact bounds: the input numerical bounds are used.
- A bounds preview bar showing what the resulting bounds will be
- Hard limits displayed (but not editable)
Initial Points
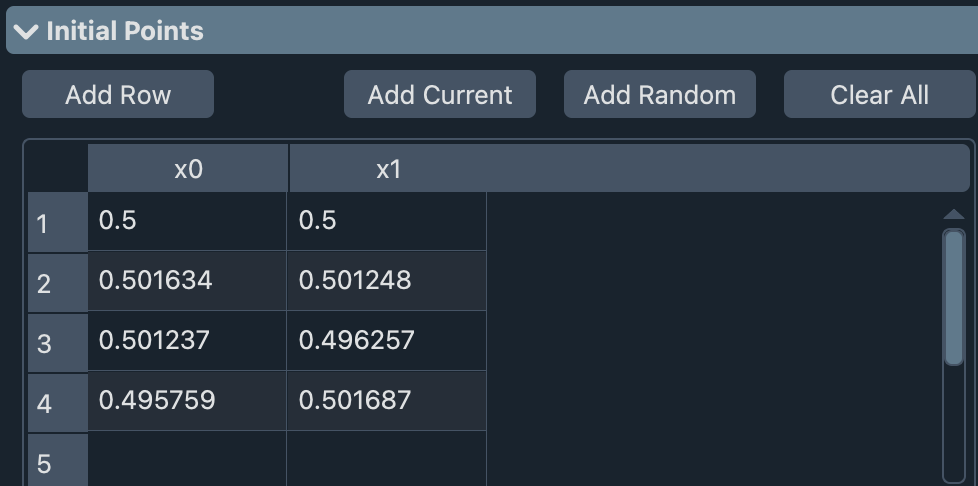
Initial points selection is collapsed by default. Points are automatically chosen from within a subset of the configured variable range.
Running an Optimization
Mini Mode defaults to automatic behavior — there is no manual/automatic Mode toggle. Once your routine is configured:
- Select or load a template
- Verify variables, ranges, and objectives
- Start the run
Variable ranges are automatically set around the current value based on template parameters.
History Tab
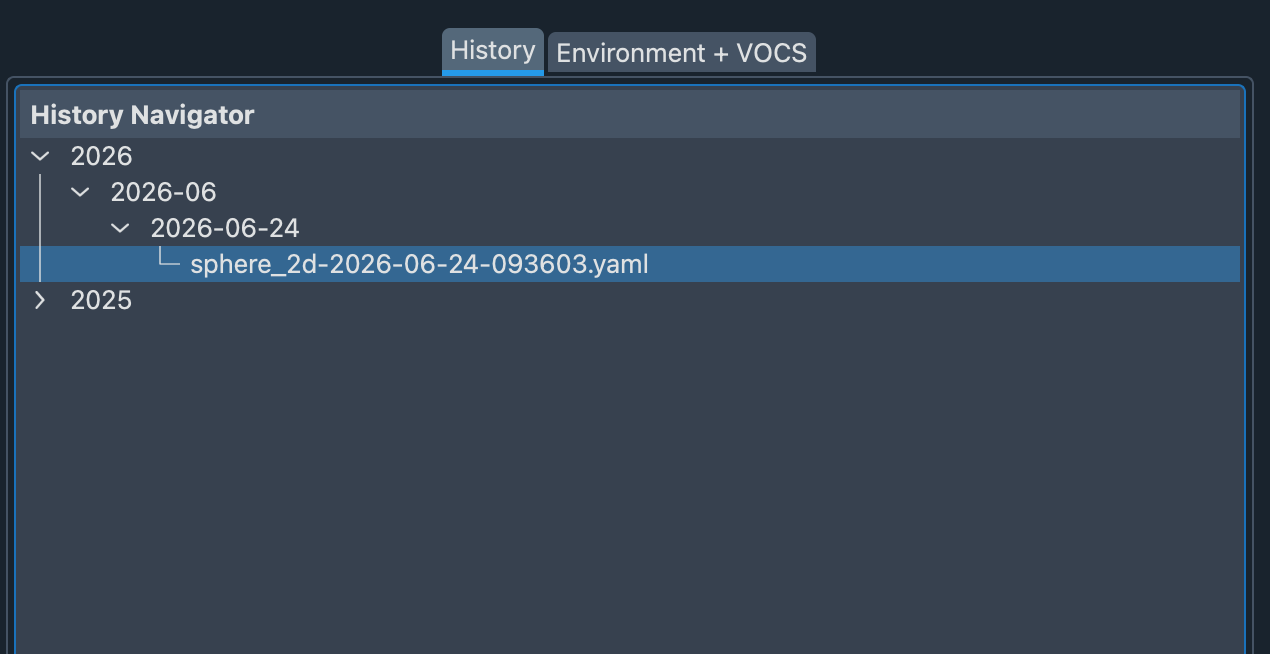
The History tab lets you browse and load past optimization runs, similar to the History Navigator in the full GUI.